Showing posts with label diy. Show all posts

Tuesday, September 24, 2024

Transform Your Space with Passementerie: Elevate Your Decor with Ornamental Trimmings


When it comes to decorating, it’s often the small details that make the biggest impact. Passementerie, the elegant term for ornamental trimmings, is a wonderful way to add that final flourish to your space. Tassels, cords, and tapes not only provide a pop of color but also bring texture, personality, and a sense of sophistication to your decor.

Think of passementerie as the finishing touch—the bow on a perfectly wrapped gift. Whether you’re aiming for a sleek, minimalist design or something a bit more luxurious, trimmings can be that versatile element that ties everything together. Here’s how you can use these beautiful details to elevate your home.


Mixing Modern Minimalism with Intricate Trimmings

In today's design world, blending different styles creates an intriguing contrast. Don’t shy away from pairing simple, clean lines with intricate trimmings. A minimalist space can come to life with just the right touch of texture. For example, adding velvet trimmings to a pillow creates warmth and luxury, perfect for creating a cozy, inviting space.


Tassels on a Pumpkin
Imagine a deep green velvet trim against a neutral-toned pillow—it instantly makes the pillow feel more special, without overpowering the rest of your decor. Likewise, placing a tassel in just the right spot on your mantel or a delicate cord along your drapes can subtly elevate the room, creating a balance between modern and classic design elements.


Cozy Up with Earthy Tones

When incorporating passementerie into your decor, color is key. Deep earth tones or soft beiges work wonders in creating a cozy, inviting winter atmosphere. These natural hues blend seamlessly into a range of color schemes and add a sense of warmth to your space.


For the winter months, think of rich browns, warm taupe, and soft creams. These colors not only evoke the season’s cozy spirit but also provide a neutral backdrop for you to experiment with brighter accents, like a pop of red or green during the holidays.


Creative Ways to Use Passementerie in Your Home

Passementerie is versatile and can be used in a variety of ways to add charm and personality to your space. Here are a few fun ideas to get you started:


  • Tassels on the Mantel: Drape tassels around the stems of pumpkins during fall or place them along your mantel as an accent during the holidays.
  • Tassels as Drawer Pulls: A tassel makes for a charming and unexpected drawer pull, adding a playful yet sophisticated touch to furniture.
  • Tassels for Tablecloths: Secure the edges of your tablecloth by adding tassels at the corners to keep it in place and add a bit of flair.
  • Tassel Garland: Create a festive garland using tassel fringe to add texture and color to your holiday decor.
  • Stocking Accents: Add a colorful tassel to your holiday stockings to give them a little extra personality.
  • Cords for Drapes: Tie back your draperies with elegant cords for a polished, classic look that complements both traditional and modern decor.

The Finishing Touches

Passementerie is all about those finishing touches that transform a room from ordinary to extraordinary. Whether you choose to use intricate trims on your pillows, tassels on your mantel, or elegant cords on your drapes, these small details add a sense of thoughtfulness to your home decor.


With a few simple, creative ideas, you can embrace the timeless beauty of passementerie and bring warmth, texture, and elegance into your space. So the next time you’re redecorating or adding seasonal accents, consider the power of these ornamental trimmings to give your home that perfect, polished look.

Friday, November 17, 2017

Recycle a Sweater

Are you looking for an easy and inexpensive decorating project? We took an old sweater that wasn't even good enough to donate and covered an outdated vase.  This DIY was quick and used things we already had.  If you want to see the whole video, click here.

Sweater Vase
Things you need: vase, old sweater, glue (spray, hot glue gun, tape) and scissors

First determine which part of the sweater you want to make the focal point of your vase.  We chose the pocket and seam.  We also cut off some of the buttons and glued them closer together.  Once you figure out which parts to use, cut and glue.  It's that simple.  The sleeves make good vase covers too, just cut them off and slip over a slender vase.

Thursday, April 25, 2013

2013 DIY Project #3 - Happy Scrappy Fabric Curtains

For DIY project #3 we had the fabulous idea to make curtains out of fabric scraps. Some great things about this project is that #1 it's easy and #2 with it being fabric scraps it is affordable. If you have ever done fabric projects in the past, odds are you have some scraps lying around the house and if you don't, hit up your local fabric store. They will have plenty of remnants just waiting to be used for a project like this.

Visit our DIY project page for step-by-step instructions on how to make these fun and super funky curtains.

For more DIY fabric projects don't forget to check out our full list and make sure to check back every month for a new project and be sure to visit our fabric page to pick the perfect fabric for your next project.

Thursday, January 31, 2013

2013 DIY Project #2 - Fabric Wreath

For DIY project #2, the lovely Rachel made a fabric wreath and since Valentines Day is just around the corner we thought why not use some cute Valentines Day inspired fabrics.


Click on the link for step-by-step instructions and video.

Check out all of our projects here and don't forget to come back next month for a new one!

Be sure to check out the sale on Jellybean Rugs! Select styles, 20% off. This is a limited time offer and is only while supplies last so you better hurry!

Friday, January 4, 2013

2013 DIY Project #1 - Fabric Wall Art

The staff at InteriorMall.com has decided to take 2013 and use it as the year of DIY. Every month we will post a new DIY project containing written step-by-step instructions and pictures as well as video.


 January:
Fabric Wall Art 

Be sure to check back every month for a new project.

InteriorMall.com is having a sale on ALL IN-STOCK Premier Prints fabric! Check out all that we have to offer while stock remains.


Friday, December 14, 2012

Pinterest

What in the world did we do before Pinterest? Well, I know I didn't know how to make no sew curtain panels or get the idea to make custom drawer pulls for my son's bedroom.
Pinterest has opened up a whole world of DIY ideas that have taken even the uncraftiest of people and made them Martha Stewart. People are more creative and more into DIY than ever before. We feel a sense of accomplishment when we complete a project that we did all on our own. Not to mention we want everything custom but don't always have the money for it. Buying custom items are double sometimes triple what it costs if you were to do the project yourself. (Keep in mind there are a few projects that should not be attempted at home.)
Items have also become more personable. Pinterest also gives us great gift, cards and invitation ideas that allows us to send something more personable to others which people find so refreshing.
So keep Pinning everyone and if you come across a Pin that you would like to see us try, let us know!

Monday, December 10, 2012

Wall decals not just for walls.....

Being that this weekend was supposed to be our last warm weekend for quite a while I decided it was time I finally worked on the table that I have in my son's room. This table was a $20.00 Wal-Mart special from when I was in college. I graduated college in 2005 if that tells you anything.
As you can see the table was nothing special. It had a light oak veneer top and gray metal legs. Since his room is superheroes and I have extra, what he calls "Hulk Smash Green" paint from painting his walls I decided I would paint the top the same color and then put peel and stick wall appliques on top. Inexpensive and easy...right up my ally. He has a gray metal castle bed in his room the same color as the table base so I decided to just leave the base the same color. He chose Spiderman appliques for the top so I purchased those as well as some water based polyurethane.

After sanding the top I painted, placed the appliques and then sprayed my polyurethane on top (I did 3 coats just to be safe) and voila!
Disclaimer: Please ignore all the toys in the floor. He's 5, his room can go from clean to messy in a matter of seconds!

As an added bonus I had left over wall appliques so now I can either use them on his dresser that I plan on refinishing or put them on his walls.

Friday, March 23, 2012

Fast and Easy Fabric Facelifts

There are so many projects that can be done with fabric remnants and the outcome is awesome. Here are a several DIY ideas you can do at home.

 Use scraps of coordinating fabrics to create a modern patchwork-effect headboard. To make the headboard, cut 8-inch squares from stiff florist's foam and 1/4-inch plywood. Cut 8-inch squares from quilt batting and place over foam squares. Glue all layers with Styroglue. Cut fabric into squares large enough to wrap the foam squares with at least a 1/2 -inch overlap on the back. Staple fabric to the back with a staple gun. Cut a piece of 1/4-inch plywood a few inches wider than your mattress on both sides. Line up the squares facedown in your desired pattern and attach them to each other with heavy-duty tape. Top them with the plywood, and drill wood screws at 8-inch intervals to secure all the layers. Attach ring hooks to the back of the plywood to hang the headboard on the wall.

Add style to a plain wooden chair with fabric. Remove the seat and back from the chair. Trace the seat on 1/2-inch foam, cut the foam, then attach it to the seat with spray adhesive. Cut fabric 3 inches wider than the seat perimeter. Wrap fabric over the seat, smoothing as you go and securing with heavy-duty carpet tape on the bottom. Trace the chair back on paper and add 1 inch all around. Using the pattern, cut two pieces of fabric. Lightly spray the front of the chair back with spray adhesive and press fabric onto the front, wrapping the allowance to the back. Fold under 1-inch allowance on the second piece of fabric, wrong sides together, and press. Use fusible webbing to adhere the fabric to the back of the chair, overlapping the wrapped allowance. Reattach the seat and back. 

Add pretty curtains to your windows or hide table storage. Whether you want to use rings with clips or sew in a rod pocket, a yard of fabric or less can turn your space into something fabulous! Use a cafe rod or a tension rod to hold the curtain.

Editor's Tip: For a no-sew option, secure hems or make your rod pocket with fusible webbing and an iron.

 
Create a designer lamp in minutes with a splashy fabric. Cut fabric pieces 2 inches longer and 1 inch wider than the lamp base and lampshade. Iron a 1-inch hem on both long edges and one short edge of each piece. Lightly spray the lamp base and shade with spray adhesive and wrap fabric around each piece, smoothing as you wrap. If necessary, secure the hemmed edges with a thin bead of fabric glue.

A yard of fabric is all it takes to make pillows as large as 30 X 30 inches. Cut a front and back piece of fabric to the desired pillow size, adding 1 inch to the length and width for the seam allowance. Place the fabric right sides together and pin, leaving an opening for stuffing or pillow form. Sew around the pinned fabric. Reach into the open seam and turn the fabric right side out: press. Insert stuffing or pillow. Hand-stitch opening closed or if you want to be able to remove the outside cover for easy cleaning sew in a zipper or make a button closure.

Reface a pair of doors while also hiding the cabinet's contents by lining the glass panels with patterned fabric. On the back of each door, stretch the fabric over the glass and use a staple gun to fasten the edges to the wooden frame. For a tidy appearance inside, conceal the staples with glued-down coordinating ribbon.

Stitch up the perfect table runner -- custom-fit to your own table -- by making a fabric "sandwich" with a piece of same-size batting in between. With right sides out and the layers pinned together, sew straight quilting lines through all pieces along the length of the runner. Cover the raw edges with binding tape adhered with fusible web. 

To finish your dining room makeover make chair covers. You don't need to slipcover an entire chair to give it a fresh new look. Make this chair-back cover with just two squares of fabric and use fusible web to adhere a fabric shape to one piece. Finish with coordinating binding tape adhered to the edges with fusible web. For a no sew option on both the table runner and the chair cover use stitch witch to hold your raw edges down when you make your hems.

To spruce up your office space or kids bedroom cover an artist canvas, cork board or piece of sheet metal with fabric. Works great as a memo board, memory board or as a piece of artwork.

Abstract fabric cutouts dress up plain card stock to make custom all-occasion greeting cards that also look great framed. Gel pen outlines and a decorative scalloped edge finish off the cards.

Group together fabric-covered balls to make a great filler for a bowl, a glass vase, or a basket. Cut fabric strips from coordinating fabrics and use glue to adhere the strips to plastic-foam balls. Select a variety of fabric patterns and use both small and large balls for extra interest.

Hopefully this gives you some great new ideas for all those extra fabric pieces. It's spring so get out there and try something new.

Wednesday, February 22, 2012

Lamp Shade Makeover

I decided it was time I gave my lamps a makeover. I am decorating my living room in peacocks so I thought, 'Why not do a peacock lamp shade?'

Here is what I started with....Pretty plain, pretty basic and the inside plastic was starting to crack.

This is everything I used for my project:
1. New Drum style lamp shade. (I like these because they are a little more contemporary and they emit more light out of the top.
2. Poster board
3. Fabric to wrap around my shade. I used Argos Bisque item #170273 from InteriorMall.com. It's still a light colored fabric but will add texture to the shade.
4. Fabric to use as a trimming. Fabric trim works well too. I used Dupioni Silk 9033 Peacock item #60307 from InteriorMall.com. I'm using this same fabric for my window treatments so I wanted to tie it all in.
5. Peacock feathers
6. Spray glue

First I wrapped the shade in my base fabric Argos Bisque, spraying the shade with glue as I went.

 Then I took strips of poster board and wrapped them in fabric. (Note - if using silk or faux silk for this be sure to only spray the strip on one side with glue as it might discolor the fabric.) Then I wrapped those around the top and bottom of my shade. If using a trim for this it is best to use a hot glue gun. Spray glue will not hold a trim or gimp over time.

Then I glued on my feathers and voila!

Tuesday, February 7, 2012

DIY Knobs

Knobs can be expensive but sometimes you don't want just "Plain Jane" knobs either. Here is how to give yourself faux ceramic knobs but without the costs.

Supplies: 

Wooden Knobs

Primer

Mod Podge

Paint

Envirotex Lite

Throw away brush

Stir Stick or Popsicle Stick

Throw away cup

Blue Painters Tape

Tissue Paper or Stickers

Printer

Step 1: Paint your knobs any color your desire and let them dry completely. If you would like to add more than 1 color to your knob, now is the time.

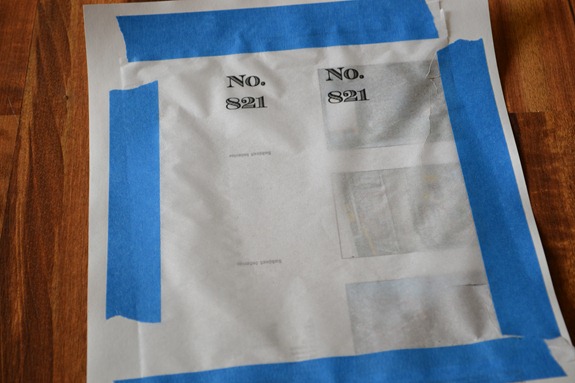
Step 2: Cut a piece of tissue paper and tape it to a piece of printer paper. Print any words or any graphic onto the tissue paper. Cut the words making sure it is a big enough square to cover the entire knob.

 Or, place any sticker onto the face of the knob.
Step 3: (Only if you are using tissue paper) Cover your knob in Mod Podge and place the tissue paper on the knob pressing the edges down smoothly. Make sure all edges and paper are sealed with Mod Podge.

Step 4: Mix your Envirotex Lite. This is what gives your knobs the ceramic look and feel. BE SURE TO READ THE DIRECTIONS!!!

Step 5: With a throw away paint brush, paint on the Environtex Lite. Make sure you cover the entire knob, not just the face. Let dry for 24 hours. And VOILA!


Note: An easy way to hold the knobs during the project so that they don't tip over and you don't have to handle them is poking the screw down into a shoe box....you have an instant knob holder.

Monday, January 16, 2012

Homemade Cleaners Toolkit: 5 Essentials to Make Your Own

Last week, I was helping my brother clean out his apartment when he complained about the prices of eco-friendly cleaners. Always looking for converts, I recommended he start making household cleaners himself — it takes very little time and all you need are these five essentials.
You can use these five basics to clean almost everything in your home, from fixtures to floors to laundry to the bathroom. Making household cleaners is one of the easiest DIY projects around and it will make an enormous difference in your home. In addition to being eco-friendly and inexpensive, it also reduces indoor air pollution.

THE FIVE ESSENTIALS:

Vinegar: This is the natural-cleaning powerhouse. It does so many things around the house that it has merited its own post time and time again. Vinegar cleans, adds shine, disinfects, and gets rid of of bad smells, mildew, and other household funk.

Baking Soda: Mixed with vinegar, it makes sinks and toilet sparkle. Mixed with a bit of water, it works great on bathtubs and gets rid of the stuck-on food on your stove top. A good, basic scouring tool.

Lemon or Tea Tree Essential Oil: A few drops will make any cleaner antibacterial.

Liquid Castile Soap: A little castile soap, like Dr. Bronner's, goes a long, long (long) way. Mix it with water to clean your counter tops (vinegar can ruin marble and granite). Also good for dishes, floors, and anywhere else that needs basic, gentle cleaning.

Rags: Make 2012 the year you reduce your paper towel usage! I color code mine for different uses: blue for my kitchen counters, green for the bathroom, and pink for dusting.

FIVE CLEANING RECIPES TO GET YOU STARTED:

Glass Cleaner: Mix equal parts vinegar and water in a spray bottle. Add a few drops of lemon or tea tree oil.

Toilet: Pour in one cup of baking soda, followed by one cup of vinegar. Clean with toilet brush as usual and flush.

All Purpose Cleaner/Kitchen Cleaner: Pour 1/4 cup Dr. Bronners into a one quart bottle and fill to the top with water. Add 2-3 drops of essential oil. Spray and wipe off with a damp cloth.

Linoleum Flooring: Mop with half a tablespoon of Dr. Bronners mixed into a half gallon of hot water. You can also add a few drops of essential oil.

Dishwashing Soap: Fill squirt bottle with one cup of castile soap, 3-4 tablespoons of water, and 5 drops of lemon (or other citrus) essential oil.

Friday, January 6, 2012

Painting Fabric on Furniture?

With the new year upon me I have felt the overwhelming urge to make sure I'm up on the trends for this year. I consider myself pretty current on fashion and home decor but I've been seeing a repeating trend in home decor that I just can't seem to wrap my brain around... Painting Fabric on Furniture. I'm assuming if I'm this confused most of our readers probably are to so I've set myself on a mission to not only understand how to do it but to feel confident enough that I would. Here's what I've found:

Things You'll Need
• Drop cloth
• Transparent paint
• Opaque paint
• 2-inch wide nylon paint brush
• 3-inch wide nylon paint brush
• Scrub brush
• Soap
• Water
• Hand-held shampooer
• Bleach
• Sponge
• Heat gun

Directions
•1 Choose your color. If you have a light-colored fabric, stick with a transparent paint as your main color. If you have a darker piece of furniture, use an opaque paint that's a couple of shades darker than the original color, but in the same color family. The same goes for furniture with patterns. Rather than trying to hide the patterns, which will result in thicker coats of paint that will be uncomfortable and could possibly result in cracking later, stick to muting the pattern as opposed to hiding it.

•2 Prepare your furniture. You can't paint over dirty furniture. Clean your furniture thoroughly with either a scrub brush, soap and water, or a shampooer with hand-held attachments. Don't use spray-on upholstery cleaner since it leaves behind residue. Make sure you rinse the fabric well. Gently blot stubborn stains with bleach, using a light touch. Allow the furniture to dry as much as possible before you begin painting.

•3 Mix and apply the first coat of your main color. Mix your paint as follows: 1/2 paint and 1/2 water. Start with short, even strokes on the front of your furniture with a 3-inch wide soft-bristled brush. After you have finished painting the entire piece of furniture with the first coat, if you're not satisfied with the coverage, mix your paint again. This time with only 1/4 water to 3/4 paint and apply a second coat.

•4 Add your accent color. Mix your accent color with only 1/4 water to 3/4 paint. Using a sponge, dab the accent color over your furniture fabric. Don't press too hard or it will overtake your main color.

•5 Prepare your furniture--again. Air dry for 2 days. Then, using a heat gun, dry thoroughly to set the paint. After you've completed this process, repeat it to really set the color. Allow the furniture to sit for another 2 days. Shampoo, rinse and dry your furniture with the heat gun. This is absolutely necessary to prevent paint from adhering to clothing, etc. Once you have completed this process, it will be ready for use.

Although I still don't feel like an expert on the subject, I would feel confident enough to at least try this method on a CraigsList pick up or garage sale bargain. I've seen the results and with most fabrics you can't even tell it's been painted. Think of the money that you could be saving by painting on new fabric rather than having to re-upholster. Now don't get me wrong, some fabrics NEED TO LEAVE but if it's just a matter of not liking the color on a chair or sofa, why not just paint it?

Instructions provided by EHow.com
Picture provided by Apartment Therapy