Monday, December 17, 2012

Ceiling Fans for Winter?

A ceiling fan can help lower energy consumption in the winter by up to 15%. The temperature of the air in a heated room varies in layers; the air near the ceiling is warmer than the air near the floor, because warm air rises. A ceiling fan can help push the warmer air that is trapped near the ceiling back down into the room, thus de-stratifying the layers of warm air. As a result, the warm air is circulated where it is needed, and the heating system does not overwork to warm the room. To properly de-stratify a warmed room, the ceiling fan should be run in a clockwise direction. This pushes the air up against the ceilings and down the walls, to gently re-circulate the warm air without creating a cooling wind chill effect.

Whether you're looking to warm up a room for winter or cool down an indoor or outdoor space for summer, Interior Mall has the Hunter, Casablanca and DecoBreeze fan for you!    

(Data and information provided by Hunter Ceiling Fan Co.)


Friday, December 14, 2012

Pinterest

What in the world did we do before Pinterest? Well, I know I didn't know how to make no sew curtain panels or get the idea to make custom drawer pulls for my son's bedroom.
Pinterest has opened up a whole world of DIY ideas that have taken even the uncraftiest of people and made them Martha Stewart. People are more creative and more into DIY than ever before. We feel a sense of accomplishment when we complete a project that we did all on our own. Not to mention we want everything custom but don't always have the money for it. Buying custom items are double sometimes triple what it costs if you were to do the project yourself. (Keep in mind there are a few projects that should not be attempted at home.)
Items have also become more personable. Pinterest also gives us great gift, cards and invitation ideas that allows us to send something more personable to others which people find so refreshing.
So keep Pinning everyone and if you come across a Pin that you would like to see us try, let us know!

Monday, December 10, 2012

Wall decals not just for walls.....

Being that this weekend was supposed to be our last warm weekend for quite a while I decided it was time I finally worked on the table that I have in my son's room. This table was a $20.00 Wal-Mart special from when I was in college. I graduated college in 2005 if that tells you anything.
As you can see the table was nothing special. It had a light oak veneer top and gray metal legs. Since his room is superheroes and I have extra, what he calls "Hulk Smash Green" paint from painting his walls I decided I would paint the top the same color and then put peel and stick wall appliques on top. Inexpensive and easy...right up my ally. He has a gray metal castle bed in his room the same color as the table base so I decided to just leave the base the same color. He chose Spiderman appliques for the top so I purchased those as well as some water based polyurethane.

After sanding the top I painted, placed the appliques and then sprayed my polyurethane on top (I did 3 coats just to be safe) and voila!
Disclaimer: Please ignore all the toys in the floor. He's 5, his room can go from clean to messy in a matter of seconds!

As an added bonus I had left over wall appliques so now I can either use them on his dresser that I plan on refinishing or put them on his walls.

Friday, December 7, 2012

Pantone 2013 Color of the Year

Yes, ladies and gentlemen Pantone has just announced the 2013 color of year. Drum roll please.....Emerald!


I personally love this color. It's vibrant, luminous, sophisticated and timeless.

Friday, October 19, 2012

Wallpaper Stripped


Wallpaper. Just hearing the word makes most people shutter. I often hear, 'Why would anyone put wallpaper in their home?' but keep in mind the wallpapers of today aren't the same as the wallpapers of yonder years. With the exception of a few types of wallpaper (i.e. Grasscloth, linen, silk, etc), it is easier than ever to hang and strip. The majority of wallpaper comes pre-pasted and strippable so all you have to do is dip the paper in water and hang it on the wall; no messy paste to deal with and when you are ready to take it down start tearing or get the paper a little wet and then go to town.

They have also started making borders, appliques and murals that are removable and reusable. These are great for kids rooms especially since they seem to change their interests and minds about as often as they change their clothes.

Just remember, wallpaper isn't all bad. I know when you just purchased a home that hasn't had renovations since the 70s and you are beginning the process of stripping the old wallpaper, you really begin to form a disliking to the stuff but just remember, as in anything else, products evolve and get better with age and they have made great strides in making wallpaper a lot more user friendly. Plus, they have come out with some really gorgeous and home decor forward wallpapers.

If you are looking to remove old wallpaper, here are some tips and tricks you might find helpful:

1. Test an area of the paper to see how easily it will remove from the wall before doing any prep work. Find a corner of the paper and pull. If it removes easily you are in luck, if not it's time to get out the perforating tool.

2. Take a perforating tool (can be found at your local home improvement or hardware store) and run it all over your walls. This puts tiny holes in the paper so that your stripping agent can seep through to the glue easier.

3. Spread your stripping agent liberally on your walls. Let that sit and soak in for as long as the directions say. The longer it sits and does its magic, the easier it will be for you in the end.

4. Starting at a corner take a metal wallboard knife (putty knife) and begin stripping the wallpaper away from the wall. Once removed make sure all glue residue is removed from the wall by taking a sponge and using the stripping agent going over the walls. Once all the residue has been removed, go over the walls once more with a sponge and warm water and let dry completely.

Wednesday, September 12, 2012

Our New Helper

Our owner David has recently acquired a new puppy.
Bree is the newest addition to the Interior Mall family and we enjoyed having her in the office today!

Bree spent the first hour getting acquainted with the staff.
(Carrie bent down to pet her and she found a good spot to play shy.)
 
Bree then spent the rest of the morning overseeing our shipping department. 
 
Then it was time for hide and go seek... I mean... "paperwork".
 
 Bree spent the afternoon making sure Purchasing stayed on their toes! 

 Work Hard Nap Harder!

Wednesday, August 29, 2012

SAMPLES SAMPLES SAMPLES!!!

I've recently taken on re-decorating my bedroom again (for those of you counting this makes 6). I really wanted to commit this time though so I changed the wall color, put up some wainscoting, really fell in love with the bedding and even began picking out a fabric for drapes. I work in the home decor business... how hard could it be?

After well over a dozen samples and an equal number of disappointed heartaches, I realized how hard this really was for me. If picking out a fabric to match a room was this hard for someone in the design business, I can't possibly imagine how hard it would be for someone who didn't have a design background at all! So here I am, sharing a few things I've learned about picking fabrics and the importance of SAMPLES SAMPLES SAMPLES!

LIGHTING
Now, I knew how different lighting can affect wall paint but never imagined how badly it would affect fabric! Typically, you will look at a fabric in a showroom. Showrooms usually have fluorescent lighting. Then you bring it home, to a room with home lighting and maybe even some outdoor lighting that filters in from a window or doorway. Lighting makes a HUGE difference. I did an experiment to show what one fabric looks like in 3 different lighting scenarios.
These images HAVE NOT been altered and were all taken with a soft flash using the same camera. How disappointed would you be if you saw an ivory/sage fabric in a showroom and brought it home to discover it was blue!?!

COLOR NAMES
What's in a name? Well, when choosing a fabric, names can be both helpful and EXTREMELY deceiving. What might be red to one person may come across more as a pink to another. Black and white are no longer black and white. Instead, black can be noir, onyx, jet, black, midnight or storm and white can be ice white, snow white, true white, off white or blanco. Don't always go by just a color name of a fabric. Get the samples so that you can go by what they look like rather than what they're called.
 
COLOR HUES
Just like calling a color by a zillion different names colors can actually come in a zillion different hues as well. While trying to pick out a blue fabric for my bedroom, I found out that I actually didn't want a true blue. Instead, I found I needed a blue with a more purple hue.
 
 
This color card is a good example of just how many different "blues" or "oranges" there are out there. Notice on the last two lines how all the colors would be considered blue but notice how many different hues there are. Some look more green or more aqua, while the first and last ones on the bottom row look white and black! Make sure when choosing fabrics to pay attention to those hues and undertones to ensure you get a perfect color match.
 
DYE LOT VARIATIONS
So let's say you've decided on a fabric. You've taken it home and it matches perfectly! Once the fabric arrives from the manufacturer though, it doesn't seem to match quite as perfectly as before. Why does this happen? Two words, dye lots. Every time a fabric gets reprinted at a manufacturers warehouse a different dye is used. Now, most of the time any differences aren't even noticeable but occasionally, a dye will become unavailable or a manufacturer has to switch machines or printers and the dye lot can vary.
Look here at the difference in color of the bird. The one of the left appears to be a muted brown while the one on the right is clearly grey in color. Although the yellow print is identical this small difference in the bird could make quite a big difference if you had already matched one up to your existing decor.
 
So how do you avoid a dye lot debacle? Choose a CFA (Cutting For Approval) whenever you are needing an exact dye match. Most manufacturers and retailers offer these at no charge. CFAs can be especially important if you are choosing a silk, velvet or faux silk fabric as these fabrics are the worst about changing dye lots.
 
 
WHAT HAVE WE LEARNED?
Samples samples samples and more samples! Most companies won't allow returns under a certain amount of yardage or dollar amount so if you order a fabric without having ordered a sample you can get stuck with fabric you can't use or, if you can return the fabric, you'll often times be out a restocking fee or handling fee. Most companies charge small fees for ordering samples but most companies will allow you to receive a refund or a store credit that you can use toward the purchase of actual yardage. Even if you have to pay... ordering samples can save you big! 


Thursday, June 28, 2012

Decorating for the 4th of July

With the 4th of July just days away, it's time to start planning your Independence Day decorations, if you haven't already. Here are a few easy decorating ideas for both inside and out.

Fabric wrapped wall display - Using either plywood board or canvas, wrap fabric around it and using either tacks or staples secure the fabric to the back. This is a great idea because it is so easy to change with the holiday or room decor.

For a fun and festive 4th of July place setting, use denim pockets to hold utensils and napkins. Cut out pockets from old worn out jeans, stencil a star onto each pocket, add your utensils and a bandana napkin and voila! A patriotic place setting your guests will love.

Spell it out - Go to any local craft store and pick up some wooden letters, red, white and blue acrylic paints and polyurethane. Get creative and paint each letter how you like then coat with polyurethane for durability; Inexpensive, takes very little time and reusable year after year. Now that's an idea everyone will love.

If you have some scrap fabric lying around wrap each letter in fabric instead of painting. Still cute and festive and you use those leftover fabrics you didn't know what to do with.

Dress up your railing - buy several yards of patriotic fabric and secure to your railing with red, white or blue yarn, string or cording. It's fast, easy and can be used year after year.

Dress up your front door - The front door is the first thing your guests will see. Get them into the 4th of July spirit before they even enter your home with a patriotic, fabric wreath.
Be sure to check out all the fantastic patriotic fabrics available at InteriorMall.com

Happy 4th of July from all of us at InteriorMall.com.

Friday, May 25, 2012

30 DIY Projects for the 3-Day Weekend

525DIY07.jpgListen up, folks: we only get a few three-day weekends each year and so it's up to each of us to make the most of them. Oh sure, you'll want to take some down time to drink some beer and bask in the sun. There's still plenty of time for a little DIYing. Check out these 30 projects for 3-day weekend inspiration.
525DIY01.jpg1. Make a grill for your budding Top Chef – How To Make a Toy Grill for $20
2. Make a place to stash your pens and pencils – DIY No-Sew Colored Pencil Roll
3. Clean your bedroom – The Ultimate Guide to Green Cleaning Your Bedroom
4. Make your kid fly – How to Make Your Baby Fly
5. Create a charging station – An Upcycled Plastic Bottle Charging Station
525DIY02.jpg6. Make a new clothes bar – How To Make a Rope Wrapped Hanging Clothes Bar
7. Go to sleep! – How to Nap (No, Really!)
8. Create an urban garden – Budget Friendly: DIY Cinderblock Planters
9. Stop the tangles – DIY Tangle-Free Headphones with Embroidery Floss
10. Make cushions, learn geography – Modular DIY Map Cushions
525DIY03.jpg11. Make a window box – DIY Wood Shim Window Box
12. Add some detail to your frames – $5 DIY: Dress Up Your Frames with Tape
13. Cover an ugly light – How To Make a DIY Drum Shade
14. Make a headboard – 10 DIY Headboard Ideas
15. Stencil something – Put Some Pattern On It: Stencil Resources
525DIY04.jpg16. Make new bedding – You Can Do It: Sew Your Own Bedding
17. Create some outdoor lanterns – DIY Leather & Glass Outdoor Lanterns
18. Make everlasting flowers – DIY Paper Flowers From Recycled Maps
19. Get your books in order – Fresh Start: How To Organize Your Personal Library
20. Dress up your can lights – How To: Make Can Light Luminaries
525DIY05.jpg21. Put up a yurt – How To Raise a Yurt in Four Hours
22. Switch out your shower head – DIY Basics: Replacing a Shower Head
23. Join the terrarium trend – Buy or DIY: Trendy Terrariums
24. Stamp it! – DIY Wine Cork Stamps
25. Dress up a wall – How To: Create A Reclaimed Wood Wall
525DIY06.jpg26. Weave a basket – DIY: Recycled Paper Sewing Basket
27. Dress a window or two – Making Your Own Curtains: Easy Instructions from Across the Web
28. Funk up your keyboard – Colorful Keyboard Makeover With Masking Tape
29. DIY an ikat mirror – How To Make an Ikat-Inspired Mirror
30. Build an outdoor dining set – Free DIY Plans: Simple Plywood Farm Style Table & Bench

Still need more inspiration. Check out last year's 30 Projects for the 3-Day Weekend
.
Images: As credited in individual posts.

Brought to you by: Apartment Therapy

Wednesday, May 23, 2012

How to Keep Your Bathroom Clean in 5 Minutes a Day

Here are the facts: I don't have hours and hours to laboriously clean my bathroom every week. Even if I did there would be more pressing things at hand, like um, anything really. So how can you keep things clean with a minimal amount of effort and time? I use the five minute rule and it works fabulously!

The truth of the matter is, you can get a great deal done in 60 seconds when you don't have distractions. It's why the 5 minute rule works so well. Even if you don't have 5 minutes back to back, there's a good chance you have 60 seconds here and there throughout the day. Want to see how it's done? Check it:

MINUTE ONE:
Minute one is dedicated to clearing off surfaces. Put away your straight iron, find a new home for your SPIN magazine, toss your makeup back in the drawer and grab that old towel off the sink. Dirty clothes should be off the floor and those bobby pins that never seem to have a home should find one.

MINUTE TWO
Minute two is all about surface cleaning. Drop in some toilet bowl cleaner and let it sit until the last few seconds and then wipe down the countertops, sink and toilet tank and seat. Give your shower a spray with either store bought or homemade daily cleaner (or white vinegar). Run your toilet brush around your toilet and you're done. It's a busy minute but it can be done in that time frame.

MINUTE THREE
Your third minute is dedicated to straightening. Refold your towels and pull your shower curtain closed so it can air out. Check to make sure you have toilet paper and even take a few seconds to straighten the bottles on your countertops and those that live in your shower.

MINUTE FOUR
You're on the downhill stretch and now it's time to check your mirrors. It's easier to get toothpaste spittle on them than you think and a quick wipe or spray with your favorite cleaner will keep them clean in a jiffy. If the mirror is already clean, take a moment to wipe down your sink and bath fixtures and make them shine.

MINUTE FIVE
Did you panic at minute two when I said clean all the surfaces? Maybe you have kids that make things messier or you just don't move at lightning speed like I do. Take an extra 60 seconds to assess anything out of sorts and finish up.

IN CONCLUSION
To make this system really work it has to be used EVERY DAY. If you skip a few days here and there it's easy for your bathroom to get that layer of dust and grime that takes more than just a few minutes to remove.

Once a week, skip cleaning your mirrors and fixtures and take a moment to sweep or mop the floor and wipe down the outside of your toilet. It can be done in a minute (ok, maybe two or three) if you mop with something easy like a Swiffer — if you can squeeze in the time to do it more frequently, great. Likewise, you can give your shower an actual scrub down — just use your time wisely and don't let it intimidate you!

http://www.apartmenttherapy.com/keeping-your-bathroom-clean-in-5-minutes-a-day-171474

Thursday, May 17, 2012

Grommet Guide

Who new grommets could be so sleek and modern? The new "it" thing is to use grommets in everything from furniture to table cloths, lamps and even bedding. Check out the pictures below for some fresh decorating ideas using curtain grommets. 


Designer Grommets always available at www.InteriorMall.com!

Thursday, April 19, 2012

Get Outside: 5 Backyard Weekend Projects

Whether it's something you've been meaning to do for years or just a fun project you hadn't thought of (pebble mosaic, anyone?), spend some quality time outdoors this weekend soaking up some vitamin D and beautifying your backyard. We've rounded up five fun, satisfying outdoor projects to kick start your weekend.

1. Add some shade to a sunny patio with a planter umbrella stand; a concrete center makes the stand super-sturdy, and plants fill the top to hide the umbrella sleeve when it's not in use.

2. Encourage bats to hang out near your house with this bat house tutorial. Need a reason to love bats? Just one of these little guys can eat more than 600 mosquitoes in a single hour!

3. Add some interest to your garden walkway with a pebble mosaic. Get creative by adding all different shapes and sizes!

4. If you have a big strong tree in your yard with an overhanging limb, it's just begging for a tree swing; not just for kids, this swing seats two adults!

5. This compost bin was designed by horticulturists at the University of California Cooperative Extension; they aimed to create a capable, efficient system that was easy to build and easy to use.

Wednesday, April 11, 2012

The History of Crewel Embroidery

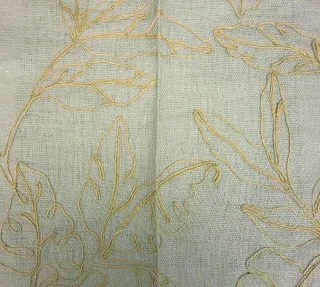
Crewel Embroidery or Crewelwork is a decorative surface embroidery that traditionally uses wool to create a design applied to any fabric.  The technique is at least a thousand years as it was used in the Bayeux Tapestry which tells the story of the 11th century Norman Conquest of England. Another modern work that crewelwork has been used is the Quaker Tapestry; 77 panels which depicts 350 years of Quaker history.

Crewel embroidery was usually produced using wool rather than cotton or silk, which separates it from the main embroidery medium, though this does not make it unique. Even though the woollen yarn used was fine in comparison to general wool yarn use, the wool still gave a much thicker stitch producing a raised aspect to the finished embroidery, which gave it its unique style. However, because of the thickness of the yarn an embroidery hoop or frame was needed in order to maintain an even tension so that the yarn did not distort the base fabric.

Probably the best examples of English crewelwork were that produced during the Jacobean period, the first part of the seventeenth century. Some examples are luckily still with us. They give us an insight into the high quality and standard that was regularly achieved by the women who produced these historical gems of embroidery. It is a tribute to them that we still admire these Jacobean crewel work pieces four hundred years after they were first produced.
Much of the crewelwork was created for domestic settings. Bedroom furnishings were particularly popular and most large country houses had crewelwork bed hangings and covers that were being used generations after their creation. Crewelwork was also used to a certain extent in clothing, with crewel-embroidered jackets being popular for both sexes at the beginning of the seventeenth century.

English crewelwork had at its root the decorative theme of the natural world of flora and fauna. Much of the work consisted of stylized flowers, leaves and trees. These could take the form of landscapes, with forest hunting scenes being particularly popular. However, some of the decorative work was much more complex and intertwined, using highly stylized flowers and leaves, giving a rich and detailed surface to the fabric.

Crewelwork made a comeback in the 60s and 70s and is slowly being seen more in decorating fabrics but with a more modern twist placed on them. Such as using raffia or velvet for the yarn rather than wool.


Friday, March 23, 2012

Fast and Easy Fabric Facelifts

There are so many projects that can be done with fabric remnants and the outcome is awesome. Here are a several DIY ideas you can do at home.

 Use scraps of coordinating fabrics to create a modern patchwork-effect headboard. To make the headboard, cut 8-inch squares from stiff florist's foam and 1/4-inch plywood. Cut 8-inch squares from quilt batting and place over foam squares. Glue all layers with Styroglue. Cut fabric into squares large enough to wrap the foam squares with at least a 1/2 -inch overlap on the back. Staple fabric to the back with a staple gun. Cut a piece of 1/4-inch plywood a few inches wider than your mattress on both sides. Line up the squares facedown in your desired pattern and attach them to each other with heavy-duty tape. Top them with the plywood, and drill wood screws at 8-inch intervals to secure all the layers. Attach ring hooks to the back of the plywood to hang the headboard on the wall.

Add style to a plain wooden chair with fabric. Remove the seat and back from the chair. Trace the seat on 1/2-inch foam, cut the foam, then attach it to the seat with spray adhesive. Cut fabric 3 inches wider than the seat perimeter. Wrap fabric over the seat, smoothing as you go and securing with heavy-duty carpet tape on the bottom. Trace the chair back on paper and add 1 inch all around. Using the pattern, cut two pieces of fabric. Lightly spray the front of the chair back with spray adhesive and press fabric onto the front, wrapping the allowance to the back. Fold under 1-inch allowance on the second piece of fabric, wrong sides together, and press. Use fusible webbing to adhere the fabric to the back of the chair, overlapping the wrapped allowance. Reattach the seat and back. 

Add pretty curtains to your windows or hide table storage. Whether you want to use rings with clips or sew in a rod pocket, a yard of fabric or less can turn your space into something fabulous! Use a cafe rod or a tension rod to hold the curtain.

Editor's Tip: For a no-sew option, secure hems or make your rod pocket with fusible webbing and an iron.

 
Create a designer lamp in minutes with a splashy fabric. Cut fabric pieces 2 inches longer and 1 inch wider than the lamp base and lampshade. Iron a 1-inch hem on both long edges and one short edge of each piece. Lightly spray the lamp base and shade with spray adhesive and wrap fabric around each piece, smoothing as you wrap. If necessary, secure the hemmed edges with a thin bead of fabric glue.

A yard of fabric is all it takes to make pillows as large as 30 X 30 inches. Cut a front and back piece of fabric to the desired pillow size, adding 1 inch to the length and width for the seam allowance. Place the fabric right sides together and pin, leaving an opening for stuffing or pillow form. Sew around the pinned fabric. Reach into the open seam and turn the fabric right side out: press. Insert stuffing or pillow. Hand-stitch opening closed or if you want to be able to remove the outside cover for easy cleaning sew in a zipper or make a button closure.

Reface a pair of doors while also hiding the cabinet's contents by lining the glass panels with patterned fabric. On the back of each door, stretch the fabric over the glass and use a staple gun to fasten the edges to the wooden frame. For a tidy appearance inside, conceal the staples with glued-down coordinating ribbon.

Stitch up the perfect table runner -- custom-fit to your own table -- by making a fabric "sandwich" with a piece of same-size batting in between. With right sides out and the layers pinned together, sew straight quilting lines through all pieces along the length of the runner. Cover the raw edges with binding tape adhered with fusible web. 

To finish your dining room makeover make chair covers. You don't need to slipcover an entire chair to give it a fresh new look. Make this chair-back cover with just two squares of fabric and use fusible web to adhere a fabric shape to one piece. Finish with coordinating binding tape adhered to the edges with fusible web. For a no sew option on both the table runner and the chair cover use stitch witch to hold your raw edges down when you make your hems.

To spruce up your office space or kids bedroom cover an artist canvas, cork board or piece of sheet metal with fabric. Works great as a memo board, memory board or as a piece of artwork.

Abstract fabric cutouts dress up plain card stock to make custom all-occasion greeting cards that also look great framed. Gel pen outlines and a decorative scalloped edge finish off the cards.

Group together fabric-covered balls to make a great filler for a bowl, a glass vase, or a basket. Cut fabric strips from coordinating fabrics and use glue to adhere the strips to plastic-foam balls. Select a variety of fabric patterns and use both small and large balls for extra interest.

Hopefully this gives you some great new ideas for all those extra fabric pieces. It's spring so get out there and try something new.